The procedure for upgrading from Udyog Aadhar to Udyam registration is based on your current registration. If the organization is new or never had Udyog Aadhar, then they have to follow a simple procedure set forth in “Comprehensive Step by Step Process for applying to a New UDYAM REGISTRATION” document. However, if the organization does have a Udyog Aadhar Registration, then the below comprehensive step by step procedure should be followed to Register for upgrading to Udyam Registration
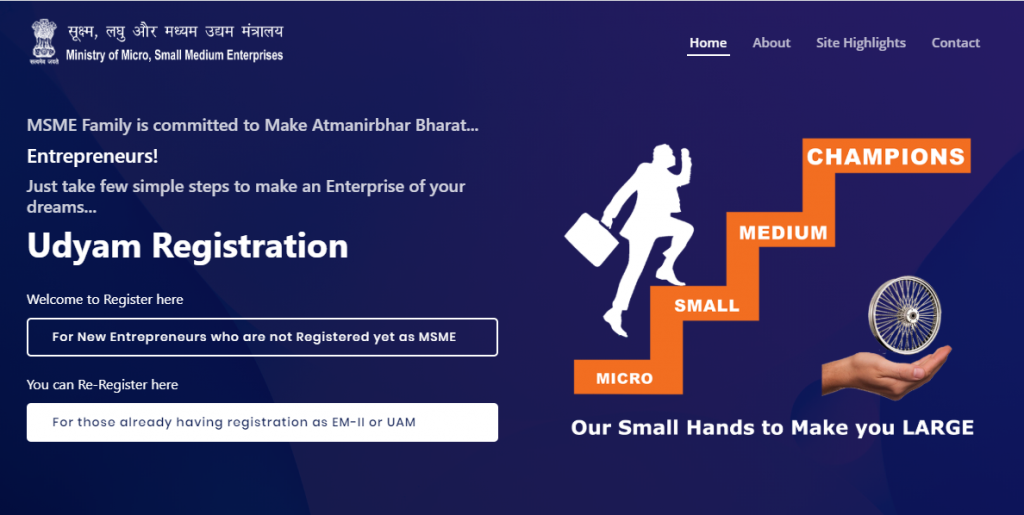
- Go to Udyam Registration Website www.udyamregistration.gov.in
- Select “For those already having registration as EM-II or UAM”
- Enter Your Udyog Aadhar Number and select Validate & Generate OTP, Enter the OTP and click on Validate OTP
- You should see a form to start the process. The process has 25 fields or sub-sections segmented into 8 sections.
Pre-requisite
Government Documents that you need to have with you before applying for the New Registration
- You will need to have the AADHAR CARD & PAN CARD ready with you
- The cards should be that of the Proprietor (Proprietorship Firm), Managing Partner (Partnership firm) or Karta (Hindu Undivided Family business)
- In case of Company, Private Limited, Limited Liability Partnership, Co-operative society, or a Trust, then the Aadhar Number of the Authorised Signatory should be submitted and the PAN number attached to the Organization should be submitted
- GST Number is required for Udyam Registration. However, for now, this is not requested as GST number is internally linked to PAN Number and hence it will be acquired from your PAN
- Income Tax (ITR) details are required for Udyam Registration. But since they are interlinked to PAN number, the PAN information is sufficient
NOTE: Where ever information is required, if such information is already available in the Udyog Aadhar Certificate, then those information would have been automatically updated. You don’t have to do any thing unless if you want to modify / Add / Remove such information
NOTE 2: Please Enter your details carefully, Once submitted you cannot edit all the details in the current system. Only few details can be edited.
Note 3: Please read the disclaimer section at the end of the article before you start using this content. We are not responsible for any mistake, problem or issue that is created by following the below information
Section 1: Udyog Aadhar Verification with OTP
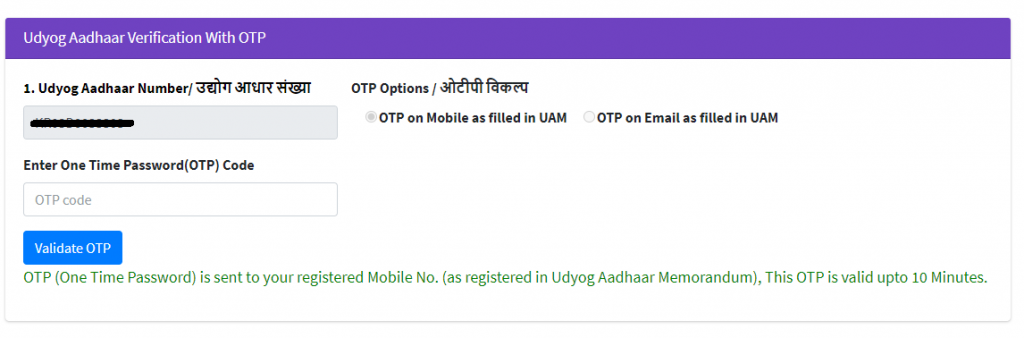
The first step is to validate the existing Udyog Aadhar Number. After validation
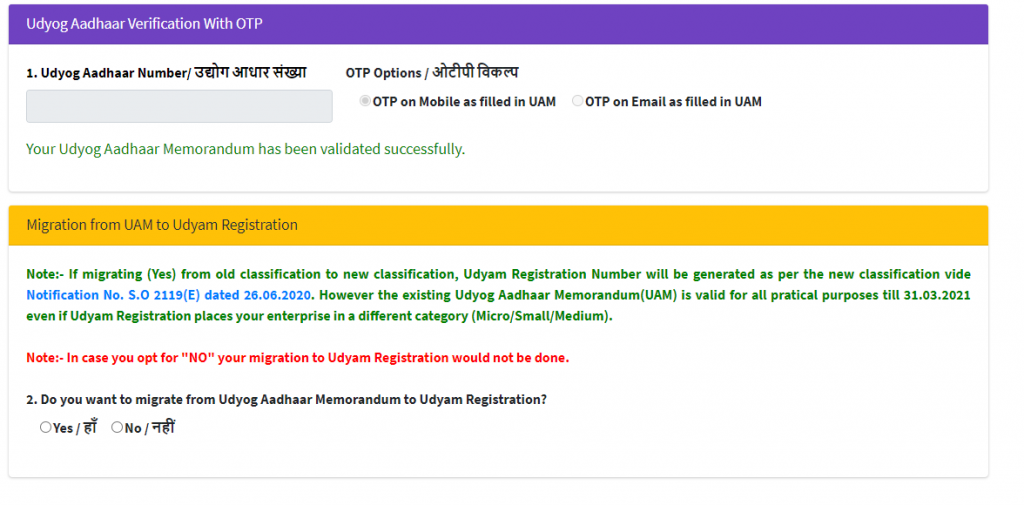
Once Details are submitted and VALIDATE & GENERATE OTP button is clicked, An OTP will be sent to the mobile number registered with Udyog Aadhar Memorandum which has to be submitted and validated.
After that a confirmation is asked
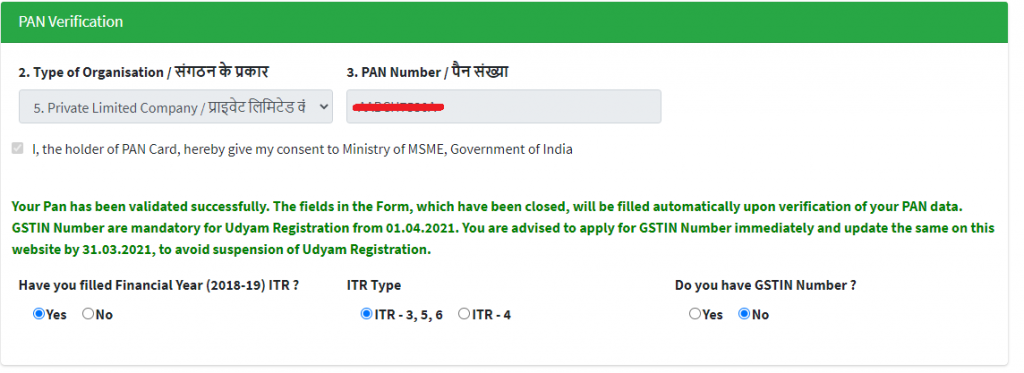
Section 2: PAN VERIFICATION (Fields 2, 3 & 4)
Once you have submitted the Aadhar Number, the next step is to validate your PAN CARD. The process is as follows
- Field 2: Select the Type of the Organization. Options are Proprietorship, Partnership, Hindu Undivided Family, Private Limited Company, Limited Liability Partnership, Society, Trust
- Field 3: Enter the PAN Number
- Click on Validate PAN Number button
- The PAN Card is validated against the PAN database and the organization details are updated
- Field 4a: Select Yes or No based on if you are a new organization or existing organization. If Yes then enter the type of Income Tax Record (ITR) that was filed in the previous year. ITR -3,5,6 or ITR-4. Many fields are displayed based on this answer
- Field 4B: Select Yes or No if you have a GSTIN number or not. Currently GST Number is not required. But it will enable other fields
Section 3: Applicant Details (Fields 5 – 10)
The Basic Details of the applicant is collected in this section. The details are about the organization, applicant details and contact details
Field 5: Name of the Entrepreneur / Enterprise as per the PAN
Dependency: Field 3. PAN Number

Field 6: Mobile Number of the Applicant for communication and validation purposes

Field 7: Email address of the Applicant for communication and validation purposes

Field 8: Social Category of the Authorised Signatory or Owners of the Organization

Note: If the organization comprises of multiple owners in the form of partners or directors or others, then to select as a particular category a minimum of 51% of shareholding of the owners in that organization should be of that particular category.
Field 9: Gender of the Authorised Signatory

Note: If the organization comprises of multiple owners in the form of partners or directors or others, then if you wish to declare it as a WOMEN ENTERPRISE, a minimum of 51% shareholding should be owned by women.
Field 10: Select if the Authorised signatory is Physically Handicapped (Divyangjan)

Note: If the organization comprises of multiple owners in the form of partners or directors or others, then to declare it as a DIVYANGJAN ENTERPRISE, a minimum of 51% shareholding should be owned by Divyangjan (physically handicapped) persons
Section 4: Organization Location (Fields 11,12 & 13)
The place of execution of business of the Organization
Field 11: Name of the Enterprise
Dependency: Field 4b. GST Number

Note: This information shall be collected GSTIN (if available)
Field 12: Address where the Plant or business execution takes place
Dependency: Field 4b. GST Number
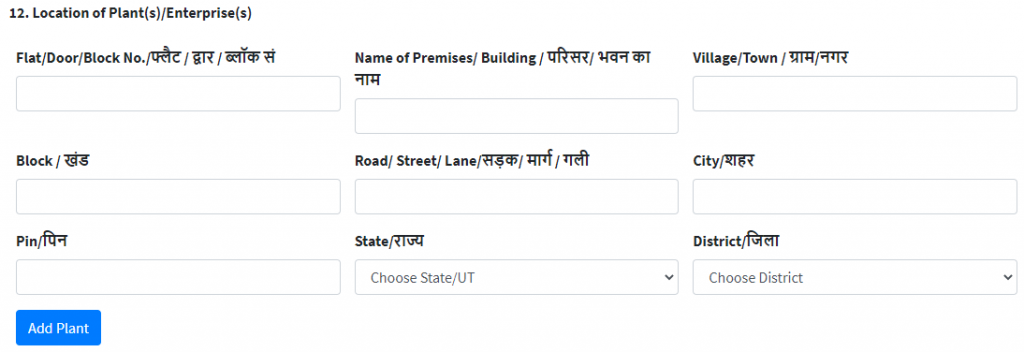
Note: If an organization has multiple business execution places such as Multi-Retail stores, Multiple Factories, then all the locations should be listed. If the GSTIN is available, then it would be automatically collected from the GST database.
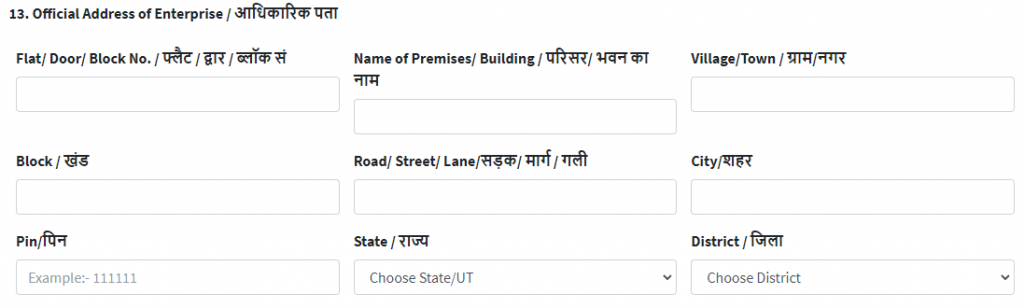
Field 13: Official Address / Head Office of the Enterprise
Section 5: Other Organization Details (Fields 14-19)
This section collects all other details about the organization
Field 14: Previously existing MSME/SSI Registrations

If the organization had any Registration such as EM 2 or Udyog Aadhar Memorandum number, then, the registration number of such registrations should be published in this field.
Note: If you have the Udyog Aadhar, then you will have to only upgrade to Udyam Registration
Field 15: Current Status of the Enterprise

Provide the details of when the organization was incorporated / registered and when it actually commenced its operations.
Field 16: Bank Account Details of the Organization

Provide the current bank account details of the organization. This will be required to pass on any financial benefits to the organization. E.g. Subsidies, DBT, etc.
Field 17: Major Activity of the Unit, to validate if it is Manufacturing or Services business

Note: Trading is also considered as a Service activity
Field 18: NIC Code of the Activities performed by the organization
Dependency: Field 17. Major Activity of Unit
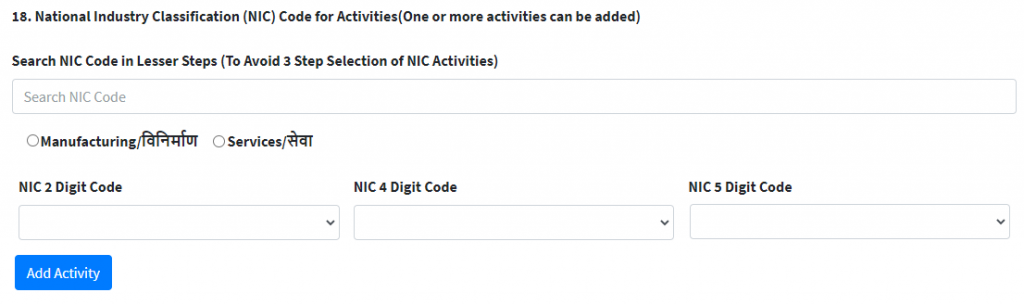
Note: NIC Code is a 5 Digit National Industry Classification code that defines the Products and Services offered by the organization. To configure NIC code
- Select if the activity is a Manufacturing (Product manufactured) or Service
- Select the top level classification from the NIC 2 Digit Code (Changes based on your activity type selection)
- Select the Sub level classification of your offering from the NIC4 Digit Code (Changes based on the NIC2)
- Select the Part Level Classification of your offering from the NIC5 Digit Code (Changes based on NIC4)
You can add any number of activities that is performed in your business.
Adding multiple activities has its own advantages as special schemes and subsidies are offered for different NIC codes. Also business opportunities in many government tenders and public procurement policies will be based on the NIC Code.
Field 19: Total Number of employees in the organization

Section 6: Investment Criteria of the Organization
This section defines the Investments made towards Capital Assets of the organization. This information is collected from the ITR 3, 5, 6 if the PAN is linked and else has to be self-declared
Field 20: Investment amount in Plant and Machinery OR Equipment
Dependency: Field 4a. Have you filed ITR

Amount of investment made by the company on the capital assets i.e. plan and machinery or equipment. It also takes into account the depreciation declared in the previous year. If the ITR is connected, then the information is acquired from there.
Field 21: Annual Turnover of the business as per the previous year (2018-2019)
Dependency: Field 4a. Have you filed ITR

Annual turnover of the organization in the previous year. If the ITR is linked, then information is acquired from there.
Section 7: Other Details (Fields 22, 23 & 24)
These are other details to help connect with public/government bodies.
Field 22: Interest to get registered as part of Government E-Market Portal

Select Yes, if you wish to produce and provide products or services for State and Central Governments and PSUs where 25% of all their procurements are reserved to be serviced by MSMEs as per the Public Procurement Policy 2018.
Field 23: Interest to get registered as part of TReDS portal

Select Yes, if you wish to register to TReDS portal which is a Bill discounting system for businesses especially when you want to take advantage of the 45 day mandatory release of payments for the products supplied or services executed to any of the Government Body, PSUs or any other business who are registered under the TReDS portal. Registering into TReDS helps businesses to manage cash flow of their organization.
Field 24: District Industry Centre where the Business Operates
Dependency: Field 13. Official Address of Enterprise

The District Industry Centre where the Organization’s Headquarters or location of execution. It is based on the City mentioned under the Official Address / Head Office of the Enterprise field.
Section 8: Acceptance and Generation of E-Certificate
The Final acceptance of the documentation provided and submitting to get the final OTP to generate the E-Certificate
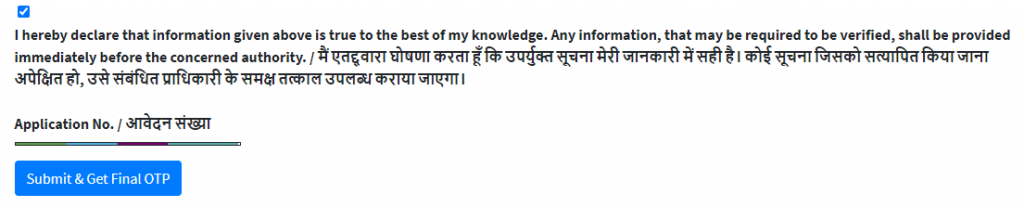
The process is
- Click on Submit and Get Final OTP button
- System will validate if all the REQUIRED FIELDS and display any errors.
- If all information is correct, then an OTP will be sent to the Mobile Number
- Enter the OTP number in the OTP box
- Submit
- All the documentation is stored and an E-CERTIFICATE is generated along with the UDYAM REGISTRATION number
- Download the E-CERTIFICATE as PDF or Print
Disclaimer: The content in this article are only for informational purpose and is not intended to substitute for professional advice. Always seek the advice of a certified professional with any questions you may have regarding the Udyam Registration. Reliance on any information provided in this article, Website or our employees is solely at your own risk. By using the procedures set, you shall indemnify IndiaTIES, its partners, vendors, etc., from any error, mistake, problem, issue, etc., that may arise by following the current set.
The documentation provided may be outdated as the udyam registration website is being updated every now and then. The procedure set in this article may or may not be valid. Please follow the right procedure if this may not suit your requirement.
Disclaimer: We donot claim that the images used as part of the news published are always owned by us. From time to time, we use images sourced as part of news or any related images or representations. Kindly take a look at our image usage policy on how we select the image that are used as part of the news.